Every so often I come across an idea so simple yet so genius that I think "Wow, I wish I had thought of that!" Especially as an engineer, I find this spray bottle from Make Projects absolutely brilliant!
I actually can't think of a situation where I've had to turn my spray bottle completely upside down, but I have had to use it sideways, so this would be very helpful. Can't wait to try it!
Tuesday, July 31, 2012
Friday, July 27, 2012
Tutorial: personalized embroidery art
An EASY PEASY gift that can be made in less than 30 minutes!! I've been seeing a lot of cute bunting in crafts these days, and was excited about trying out something with bunting myself. I especially wanted to make something that would be a cute, simple, and quick last-minute gift.
Step 1. Cut out a square of fabric and place in mini embroidery hoop. I used a very small 4-inch hoop. With a disappearing ink pen, mark the fabric where you want your bunting to go. I just made 2 tiny marks on either end of where I imagined the bunting would go.
Step 2. Cut some tiny triangles of whatever scrap fabric you have around.
Step 3. Cut a strip of double-stick fusible webbing. Peel off one side to reveal stickiness. Place all of the triangles on the sticky side, then trim away the excess fusible webbing. You should be left with fabric triangles with sticky stuff on the back.
Step 4. Arrange the triangles on your fabric (without the embroidery hoop), and iron into place. (You can see that my college budget version of an ironing board is a towel on a table.)
Step 5. Place back in embroidery hoop. Use any color embroidery floss to make a "line" that connects all the triangles. Also add the recipient's name!
If you've never embroidered before, there are some really great tutorials on the web. (Like here: http://blog.craftzine.com/archive/2012/06/new_how-to_embroidery_videos_f.html) Learning how to embroider a simple line is a great starting point! Since a name might be a tad more difficult, you could just use a Sharpie for that part.
Step 6. Trim away the excess fabric around the hoop. Tuck in and glue into place with a hot glue gun.
FIN. And ready to be gifted!
Friday, July 20, 2012
Tutorial: "Clothesline" Wall Display
Got a blank wall and no fancy art to fill it with? I did! Until I came across some mini clothespins at my local Jo-ann store and decided to try out this wall display. It's super easy and makes you look instantly artsy :)
You only need 3 things:
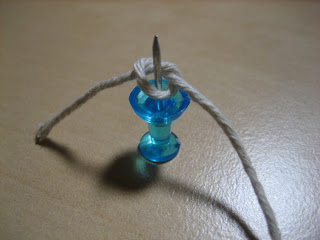
Step 1: Start your first push pin by tying a knot with your string, around the pin. Pin this into the wall. This will be the uppermost left or right point of your display, depending on which direction you go with the next pin.
Step 2: Insert your second push pin into the wall (see the title photo for reference). Wrap the string one complete time around the pin, leaving a little slack in the string.
Step 3: Start hanging photos on the first segment. I like to do this before adding more push pins because you can't really anticipate how the weight of the photos/cards will affect the look of your string until you actually try it. I learned this the hard way!
Step 4: Repeat Steps 2 and 3 with more push pins and more photos!
Step 5: When you get to the last push pin, tie the string just like the first one.
Some notes:
* My display is kind of short width-wise, but only because my wall space was limited by my bookcase.
* You'll probably have to play around with the weight distribution of your photos to make it look pretty.My finished product! (with some room to spare)
Subscribe to:
Comments (Atom)


